How to Make Sports Cards?
Contents
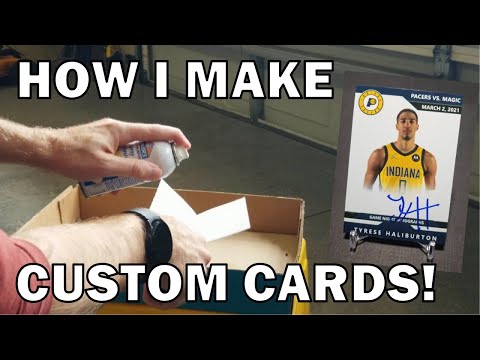
How to Make Sports Cards? In this blog, we’ll show you how to make your own sports cards. You’ll need some basic supplies and a little bit of time, but the process is easy and the results are impressive. So, let’s get started!
Checkout this video:
Introduction
Sports cards are a fun way to collect your favorite athletes and teams. You can find sports cards at your local card shop or online. You can also buy them at some sporting events. To make your own sports cards, you will need card stock, scissors, a printer, and a photo of your favorite athlete or team.
What You Will Need
Making your own sports cards is a fun and easy way to show your support for your favorite team or player. You can make cards for any sport, and all you need is a computer and some basic supplies. Here’s what you’ll need to get started:
-A printer: You’ll need a printer that can print on cardstock. Most home printers will work, but if you’re planning on making a lot of cards, you might want to invest in a higher-quality printer.
-Cardstock: You can find cardstock at any office supply store. It comes in a variety of colors and weights, so you can choose the kind that best suits your needs.
-Sports images: You’ll need images of your favorite players or teams. These can be photos, illustrations, or even just simple logos. If you’re having trouble finding good images, try searching online or looking through sports magazines.
-Scissors: You’ll need scissors to cut out the images of your favorite players or teams.
– adhesive: You’ll need some sort of adhesive to attach the images to the cardstock. Glue sticks and double-sided tape work well for this purpose.
Step One: Choose Your Design
The design of your sports card will be the most important factor in its appeal to collectors. You’ll want to choose a design that is both visually appealing and informative. You’ll also want to make sure that your design is easy to reproduce so that you can make as many copies as you need.
There are a few different ways that you can go about designing your sports cards. You can hire a professional graphic designer to create a custom design for you. This is the most expensive option, but it will also give you the best results.
If you’re on a budget, you can try using one of the many online templates that are available. These templates will allow you to create a professional-looking card without having to hire a designer.
Once you’ve chosen your design, it’s time to move on to step two: printing your cards.
Step Two: Gather Your Materials
Now that you know what you need to make your sports cards, it’s time to gather your materials. If you’re going to be taking your own photos, you’ll need a good digital camera. A DSLR camera is ideal, but a point-and-shoot camera will work in a pinch. You’ll also need a tripod to keep your camera steady while you’re taking the photo.
If you’re going to be using stock photos, you can find plenty of free images online. A quick Google search will turn up many options. Just be sure to check the licensing on the photo before you use it, to make sure you’re not violating any copyright laws.
Once you have your photo, the next step is to print it out. You can print your sports cards at home using a color printer, or you can take them to a professional printer. If you’re using stock photos, most of them will come in high resolution, so you can get them printed at a large size without losing any quality.
Finally, you’ll need some cardstock to print your cards on. Cardstock is thicker than regular printer paper, so it will hold up better over time. You can find cardstock at any office supply store, or online.
Step Three: Cut Out Your Design
Using scissors or a craft knife, cut out your design. If you are using a craft knife, be sure to protect your work surface with a cutting mat or cardboard. If you are using scissors, you can cut along the drawn lines or freehand.
After you have cut out your design, use a ruler and pencil to draw lines on the back of the card about 1/4 inch from the edge. These lines will help you score the paper so that it folds evenly.
Fold the card along the scored lines and use a bone folder or the back of a spoon to help create a clean fold.
Step Four: Assemble Your Card
Now that you have all of your materials, it’s time to start making your card. Begin by folding your card stock in half so that it’s 4.25” x 5.5”—this will be the finished size of your card.
Then, use a paper trimmer or scissors to cut a piece of sports-themed scrapbook paper to 4” x 5.25”. Adhere this piece to the front of your card usingdouble-sided tape or adhesive dots.
Now you can start decorating! Use stickers, stamps, and die cuts to create a one-of-a-kind design on the front of your card. You can also add ribbon, buttons, and other accents. Be creative—there are no rules!
When you’re happy with your design, it’s time to move on to the inside of the card. Start by trimming a piece of white card stock to 3.75” x 5”. This will be the “writing surface” for the inside of your card.
Adhere this piece to the inside of your card using double-sided tape or adhesive dots, then write a message using a black pen or marker. You can also decorate the inside of your card with additional stickers, stamps, die cuts, etc.—again, be creative and have fun!
Once you’ve finished decorating both the front and inside of your card, put a few strips of double-sided tape or adhesive dots on the back side along the fold (this will help keep everything in place), then fold your card shut and trim off any excess paper along the edges
Step Five: Add Your Details
Now that you have your basic card, it’s time to add some information. player name, team name, position, and any other relevant information. You may also want to include a headshot or action shot of the player. You can find some good quality images by searching online or on social media sites like Twitter. Once you have your image, you can use Photoshop or another photo editing program to add it to your card. Be sure to resize the image so it fits nicely on the front of your card.
Conclusion
Now that you know how to make sports cards, it’s time to put your new skills to the test. Get some friends together and have a card-making party. You can also make cards for special occasions, such as birthdays or holidays.
Sports cards are a fun way to take your love of sports and turn it into a creative hobby. With a little practice, you’ll be making cards that are sure to score big with family and friends.