How to Make Hair Bows for Sports Teams?
Contents
Sports teams can show their team spirit by adding hair bows to their uniforms. Learn how easy it is to make hair bows for sports teams.
Checkout this video:
Why make hair bows for sports teams?
There are many reasons why you might want to make hair bows for sports teams. Perhaps you are a coach who wants to show your support for your team by making bows for all the girls. Or, maybe you are a parent who wants to make sure your daughter’s hair stays out of her face while she is playing. Whatever your reason, making hair bows for sports teams is a fun and easy project that anyone can do.
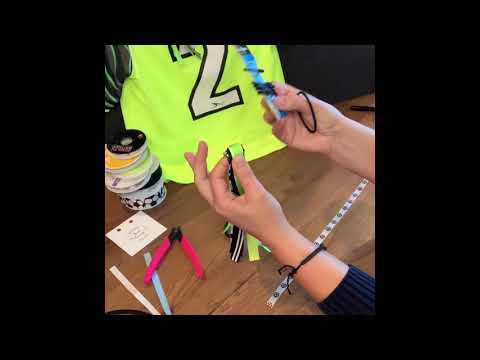
One of the great things about making hair bows for sports teams is that you can customize them to match the team’s colors or mascot. You can also add other embellishments, such as rhinestones or streamers, to make them even more special. If you are not familiar with how to make hair bows, there are many tutorial videos and step-by-step instructions available online. With a little practice, you will be able to make professional-looking hair bows that will show your support for your favorite team.
What kind of materials do you need?
To make hair bows for sports teams, you will need the following materials:
-1/4 inch ribbon
-scissors
-needle and thread
-hot glue gun and glue sticks
-lighter
Instructions:
1. Cut a piece of ribbon that is about 18 inches long.
2. Fold the ribbon in half, so that the two cut ends are touching.
3. Use a needle and thread to sew a running stitch along the open side of the folded ribbon, about 1/4 inch from the edge.
4. Gather the ribbon together tightly, and knot the thread to secure it. Trim any excess thread.
5. Use hot glue to attach the bow to a headband or clip.
6. Hold the ends of the ribbon together, and use a lighter to slightly melt them together to prevent fraying
How to make a basic hair bow
Basic hair bows are relatively easy to make and only require a few supplies. You will need:
-Ribbon
-Scissors
-Glue
-A hair barrette or clip
1. Cut a length of ribbon. The size will depend on how big you want your bow to be. For a small bow, cut a length of ribbon that is about 10 inches long. For a medium bow, cut a length of ribbon that is about 12 inches long. For a large bow, cut a length of ribbon that is about 14 inches long.
2. Make a loop with the ribbon and glue it in place. This will be one of the loops for your bow.
3. Make another loop with the ribbon, but do not glue it in place yet. Take the first loop that you made and place it over the second loop. Then, glue the second loop in place so that it overlaps the first loop slightly. This forms the center of your bow.
4. Make two more loops with the remaining ribbon, one on each side of the center of your bow. Glue these loops in place so that they overlap the center slightly. These are the outer loops for your bow.
5. Trim any excess ribbon from the sides of your bow using scissors, if necessary. Then, glue or sew a hair barrette or clip to the back of your hair bow so that you can wear it in your hair!
How to make a more elaborate hair bow
If you want to make a more elaborate hair bow, you will need the following supplies:
-1/4 yard of ribbon
-4 alligator clips
-glue gun
-scissors
-lighter
1. Cut the ribbon into three even strips. Fold each strip in half and then in half again so you have a loop at one end and four tails at the other.
2. Take two of the loops and tie them together in the middle with a double knot. Then take the remaining two loops and tie them together in the middle with a double knot. You should now have two smaller loops with tails.
3. Take one of the alligator clips and attach it to the back of one of the small loops. Then take another alligator clip and attach it to the back of the other small loop.
4. Cut a piece of ribbon that is about 18 inches long. This will be used to tie around your ponytail.
5. Take one of the tails from each small loop and glue it to the top of the alligator clip. Repeat with the remaining tails and alligator clips.
6. Now it’s time to put your hair up in a ponytail and secure it with the ribbon you cut in step 4. Once your ponytail is secure, put on your hair bow!
How to make a bow with a team logo
To make a bow with a team logo, you’ll need the following:
-grosgrain ribbon in team colors (minimum of two colors)
-a hot glue gun
-scissors
-a lighter
-a template of the team logo (optional)
Instructions:
1. If you are using a template, trace the logo onto the ribbon and cut it out. If you are not using a template, proceed to the next step.
2. Cut two strips of ribbon, each approximately 18 inches long. These will be the loops of your bow.
3. Cut one strip of ribbon, approximately 12 inches long. This will be the center of your bow.
4. Lay the three strips of ribbon down on a flat surface, making sure that they are aligned at one end.
5. Apply a line of hot glue along the middle of the ribbon strips and press them together. Allow the glue to cool and set for a few seconds before proceeding to the next step.
6. Fold the glued portion of the ribbon over to form a loop, and press it down so that it adheres well to itself. Repeat this step with the other side of the glued portion, forming two loops. These will be the loops of your bow.
7. Take the remaining strip of unglued ribbon (the 12-inch strip) and tie it around the middle of your bow, pulling it tight so that all three layers are flat against each other in the back. Tie this strip in a knot, or secure it with another line of hot glue if you prefer. Trim any excess ribbon from this middle strip, as well as from The tails Of The loops Of Your bow