How to Tape a Knee With Sports Tape
Contents
Learn how to tape a knee with sports tape with this step-by-step guide. Sports tape can be used to provide support to the knee and prevent injuries.
Checkout this video:

Preparation
Before you begin taping the knee, it is important to clean the skin and remove any hair that might be in the way. This will help the tape to stick better and will also help to prevent any irritation. Once the skin is clean, you can begin to apply the tape.
Clean the knee
Before you start taping, it’s important to clean the skin around the knee. This will help the tape adhere better and will also help prevent skin irritation. You can use a mild soap and water or an alcohol-based cleaner. Avoid using lotions, creams, or oils on the skin before taping.
Cut the tape
When you’re taping a knee, you’ll need to start by cutting the tape. Don’t just rip it off the roll — this will create jagged edges that can irritate your skin. Instead, use scissors to cut the tape to the desired length. You can also use a utility knife, but be very careful not to cut yourself.
Once the tape is cut, peel away the adhesive backing and apply it to your skin. Start at the top of your thigh and work your way down to your calf, being careful to smooth out any wrinkles or air bubbles as you go.
Taping the Knee
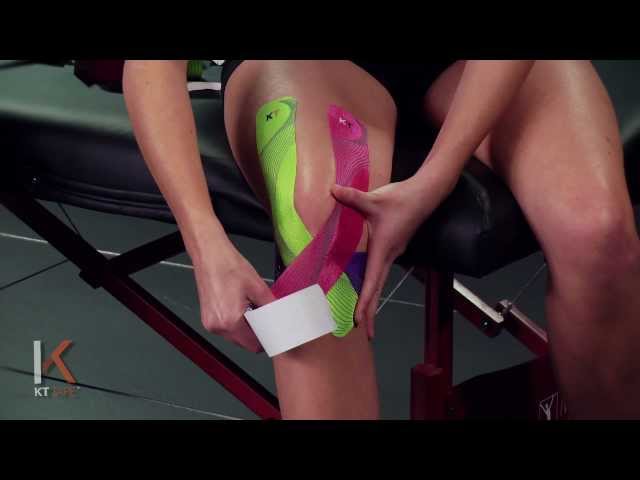
Sports tape can be a great way to support the knee and prevent injuries. It is also great forlder people who are looking for support and pain relief. When taping the knee, it is important to start at the bottom of the kneecap and work your way up. You will want to avoid putting the sports tape on the joint line or on any bony prominences.
Apply the first strip of tape
With the knee slightly bent, place the center of the tape on the kneecap. Wrap the ends of the tape around the front and back of the knee, crossing in the middle. Apply gentle pressure to secure in place.
Apply the second strip of tape
To apply the second strip of tape, start at the middle of the kneecap and wrap the tape around the knee. Make sure the strip of tape is stretchy so that it can move with your knee. Continue wrapping the tape around the knee until you reach the other side.
Finishing Up
Now that you have your knee taped, it’s time to finish up and get ready for your game. You will need to put on your sock and shin guard, and then your cleats. Make sure that your laces are tied tightly, but not too tightly. You don’t want to cut off circulation to your foot. Once you have your cleats on, stand up and walk around a bit to make sure that everything feels good and that your knee is supported.
Apply the third strip of tape
Now that you’ve put on the first two strips of tape, it’s time to put on the third one. This strip will go diagonally across your knee, from the top of your thigh to the bottom of your calf.
Again, start with the middle of the strip at the center of your knee joint. Once you have the strip positioned correctly, smooth it down onto your skin from the middle towards both ends. Once it’s in place, use your fingertips to press down on both ends of the strip and secure it in place.
Apply the fourth strip of tape
Now that you’ve applied the first three strips of tape, it’s time to apply the fourth strip. This strip will go over the top of the kneecap, and will help to keep it in place.
To apply this strip, start at the bottom of the kneecap and hold the end of the strip with one hand. With your other hand, smooth the strip up over the kneecap and then down onto the upper thigh. When you get to the end of the strip, use your fingers to press down on the adhesive so that it sticks in place.